
0
Owner's of the iOptron Telescope MINITOWER-II gave it a score of 0 out of 5. Here's how the scores stacked up:

iOptronCorp.|6EGillStreet|Woburn,MA01801USA|(781)569‐0200|TollFree(866)399‐4587|www.iOptron.com
3
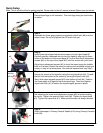
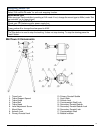
Step 7.
Set telescope to PARK POSITION. (1) Position the mount so that the “S”
is facing south. (2) The telescope tube should be pointed directly up at the
zenith. If it is not perfectly straight then loosen the altitude lock (#12) to
adjust telescope. Once it is straight re-tighten the altitude lock to make
sure OTA is secure and will not spin.
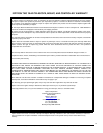
Step 8.
This step allows you to attach the counterweight or a second scope.
(note:
if you have a light scope less than 10 lbs. on the primary side, then attaching a
counterweight is optional).
First, make sure altitude lock (#12) is tightened. Loose the counterweight
shaft lock #13. Tap the center of the primary dovetail and pull the
counterweight shaft (#17) out to a desired length. Tightened the
counterweight shaft lock #13 to secure it.
If you are attaching a second scope do not add the counterweight.
Instead, skip to Step 11 to add a second scope.
Step 9.
Slide the counterweight onto the counterbalance shaft (#17). Insert the
brass pin into the hole on the counterweight. Note: when tightened this
brass rod should fit into the groove on the shaft.
Step 10.
Secure the counterweight by tightening the lock knob. Again, the
counterweight should fit over the groove of the arm so that the brass rod
fits into the groove when tightened.
Next: Skip to step 12.
This step is for attaching a second scope.
Step 11.
Attach Secondary Dovetail Holder (#14) by tightening the holder lock
(#16) onto the counterweight arm (#17).
After sliding your scope into the dovetail holder—secure the scope by
tightening the secondary lock (#15)
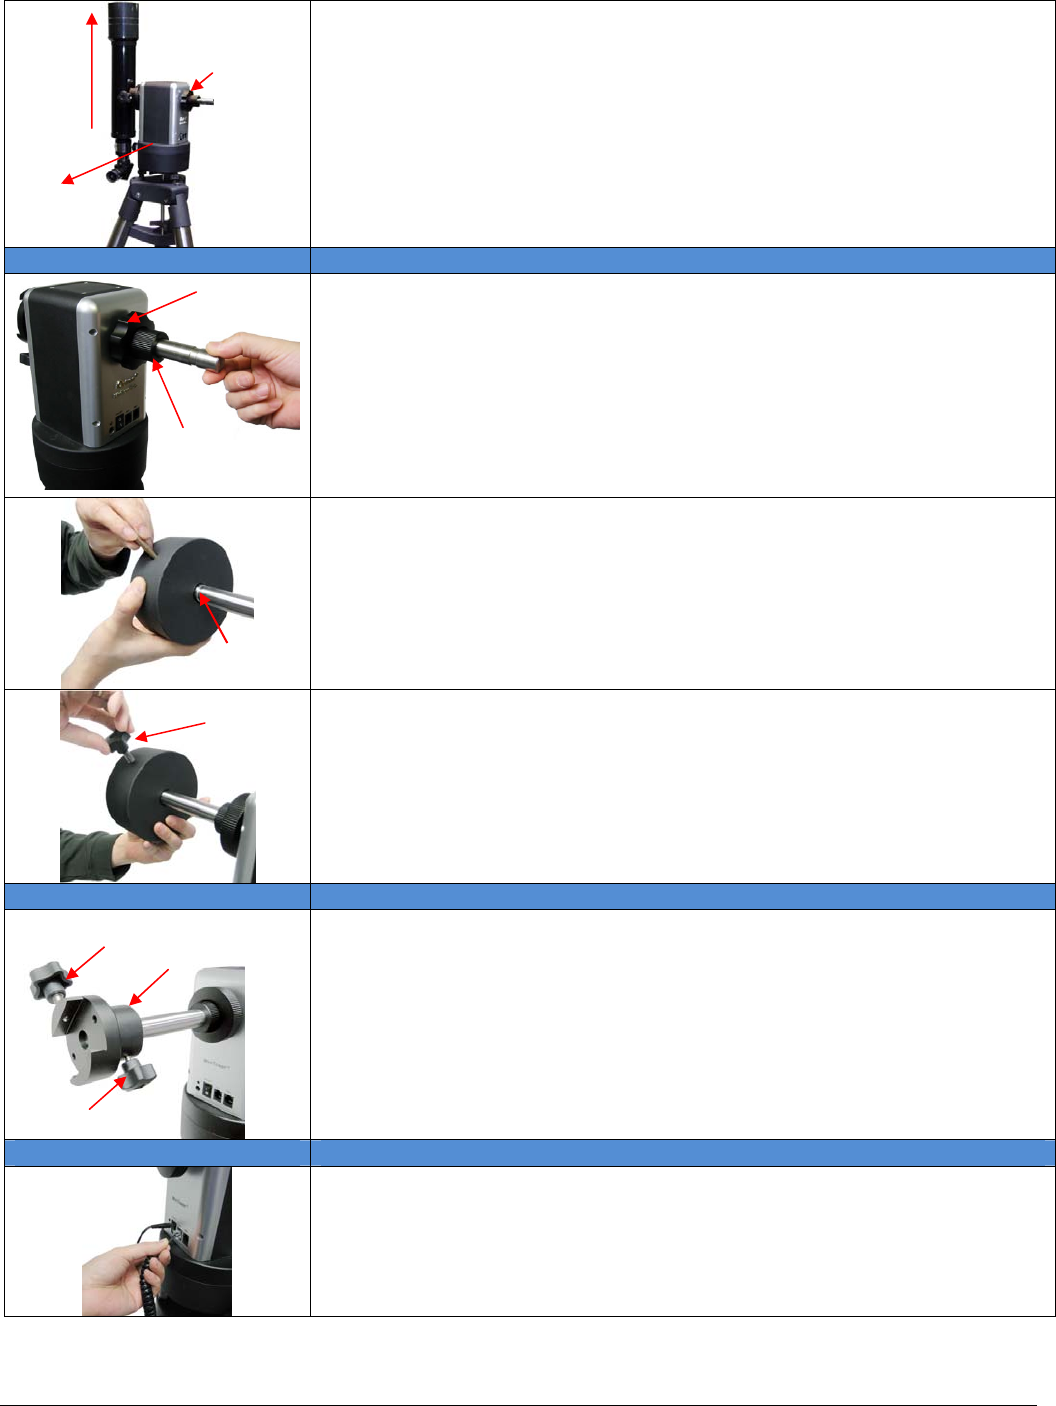
Step 12.
Plug in power plug and hand controller.
Note: You can also install 8 AA batteries in the side panel. Be sure to use fresh
batteries as low batteries can cause error messages to occur.
1)South
2)Up
#12
groove
Lockknob
#15
#16
#14
#13
#12


Find Your Products By Category
Please Login
