
0
Owner's of the iOptron Telescope 6002 gave it a score of 0 out of 5. Here's how the scores stacked up:
Having trouble setting up or making it work? Email us at 900X70@ioptron.com We’ll be glad to help!
6
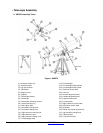
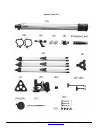
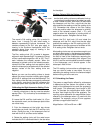
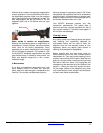
9. Assemble the right ascension (R.A.) control
cable (27, short cable) and declination (Dec) control
cable (28). These cables are locked into position by
firmly tightening the screws at the end of each
cable.
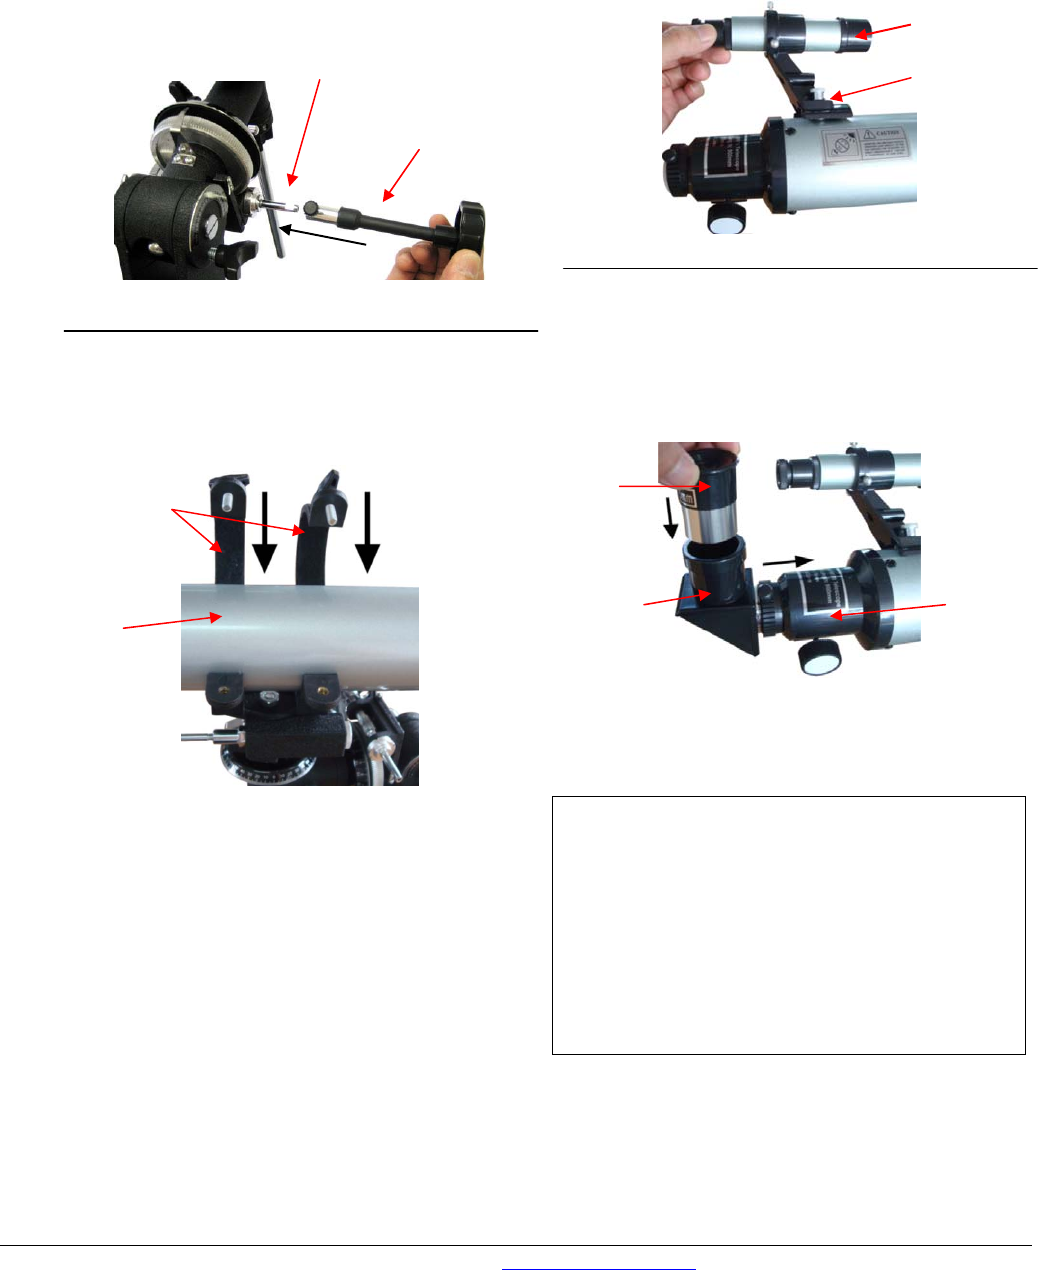
10. Place the optical tube assembly (OTA) (11)
into the scope mounting rings (10) and tighten the
two wing screws on the tube mounting to secure the
OTA.
11. Loosen two screws at the end of the OTA.
Mount the finderscope bracket (7) onto the
telescope using these two knurled screws.
12. Insert the diagonal (5) into the eyepiece holder
tube (25) and the eyepiece (6) into the diagonal.
Tighten the thumbscrews to a firm feel only. If the
3X Barlow lens is needed, insert the Barlow into the
eyepiece holder tube first.
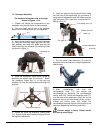
The telescope is now fully assembled and ready to
use. You can move the telescope in altitude
direction (up and down) and azimuth direction (left
or right) by slightly release the latitude adjustment
knob (24) and azimuth adjustment knob (23). Or
you can move the telescope along the right
ascension and declination direction by loosen the
right ascension locking knob (14) and declination
locking knob (12).
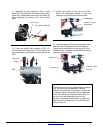
R.A. control cable (27)
Lock trench
Screws to mount
finderscope
Eyepiece (6)
Diagonal (5)
Eyepiece holder
tube (25)
Finderscope
OTA
Mounting
Rings


Find Your Products By Category
Please Login
