
0
Owner's of the iOptron Telescope iOptron Telescope gave it a score of 0 out of 5. Here's how the scores stacked up:
5
iOptron Corp. | 6E Gill Street | Woburn, MA 01801 USA | (781) 935-2800 | Toll Free (866) 399-4587 | www.iOptron.com
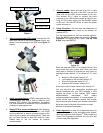
Polar axis adjustment: Loosen Azimuth Locking
T-Bolts, adjust the Azimuth Adjustment Knobs to
do a fine adjustment of the mount in the azimuth
direction. Tighten the locking T-bolts to secure the
mount. Loosen four Latitude Lock Screws on the
side of the mount, turning the Latitude Adjustment
Knob so that the latitude reading from the Latitude
Mark Window equals to your local latitude. Use
the Lever for a fine latitude adjustment. Re-tighten
the locking lock screws.
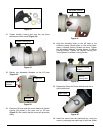
Quick Polar Alignment:
(1) Take off the Polar Axis Cover and Polar
Scope Cover;
(2) Thread the dark field illuminating LED into the
thread-in hole on a polar scope. Plug the LED
cable into the Reticle socket located on the
RA unit. The illumination intensity can be
adjusted using the HC via “Set Eyepiece
Light” function under “Set Up Controller”
menu;
(3) Use the “
▲” or “▼” button to turn the DEC axis
to unblock the Polar Scope view (there is a
hole on the DEC axis). You may loosen the
DEC clutch to turn the DEC axis without
rotating the telescope;
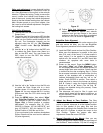
Figure 14
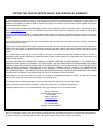
(4) Use the “◄” or “►” button to turn the RA axis
to rotate the Polar Scope dial to a clock
position where 12 is at the top, as shown in
Figure 14. You may release the R.A. Locking
Screws and hold the OTA while turning the
R.A. axis;
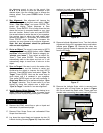
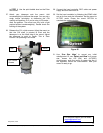
(5) Press the MENU button, then select “Align”
and “Pole Star Position” to display the Pole
Star Position on the LCD screen. Shown in
Figure 15(a) is Polaris position in northern
hemisphere. For example, May 30, 2010,
20:00:00 in Boston, US (alt N42º30’32” and
long W71º08’50”), 300 min behind UT, the
Polaris Position is 1h26.8m and 41.5m.
(If you are located in the southern hemisphere,
Sigma Octantis will be used as the reference
for polar alignment.)
(a) (b)
Figure 15
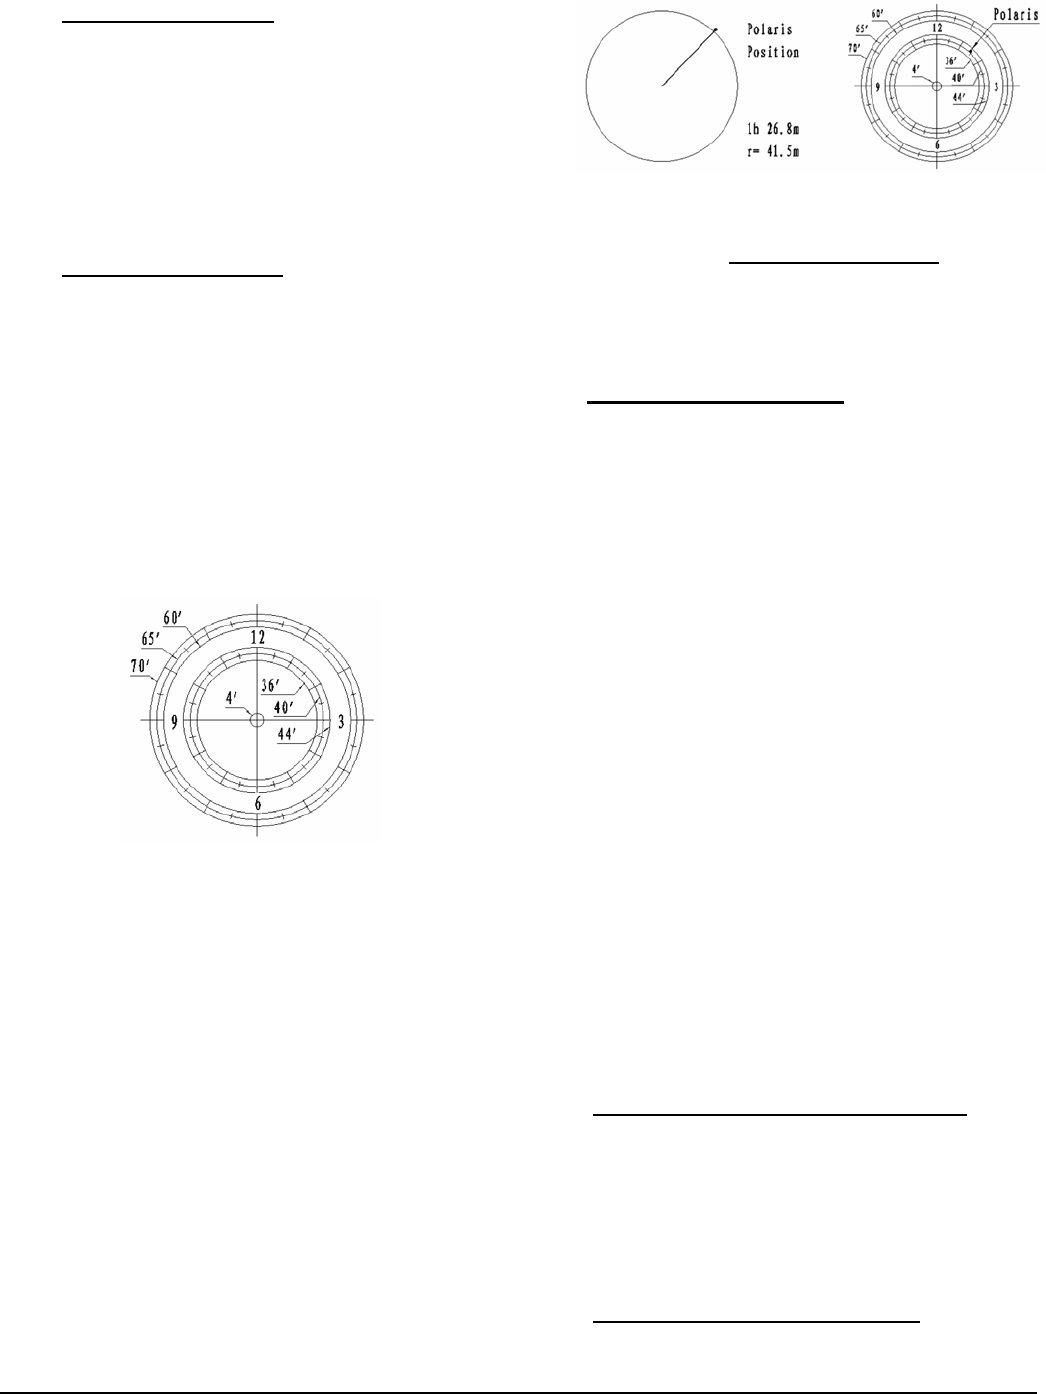
(6) Follow Polar Axis Adjustment
procedure to
adjust the mount in altitude and azimuth
directions and put the Polaris in the same
position on the Polar Scope Dial as indicated
on the HC LCD, as shown in Figure 15 (b).
BrightStar Polar Alignment
If the mount is not equipped with a polar scope or the
pole star cannot be seen, you can use BrightStar
Polar Alignment procedure from the hand controller:
(1) Level the iEQ45 mount and set it at Zero Position.
Make sure the telescope is parallel to the pole
axis (R.A. axis) of the mount. If a finder scope is
used, adjust it to be parallel to the telescope
optical axis. Set correct R.A. and DEC back lash
numbers. An eyepiece with cross hairs is
recommended.
(2) Power on the mount. Press the MENU button,
then select “Align” and “Polar Alignment”. The
HC will display the azimuth and altitude position of
several bright stars near meridian. Select one that
is visible from the site as aligning Star A. Follow
the on screen instruction to move the Star A to the
center of the eyepiece with a combination of
Latitude Adjustment Knob and the “◄” or “►”
button. Press ENTER to confirm. Then select a
bright star that is close to the horizon as aligning
Star B. Center it using the Azimuth Adjustment
Knob and “◄” or “►” button (The “▲” and “▼”
buttons are disabled during the process). Press
ENTER to confirm.
(3) The telescope will point to Star A again and
repeat above steps until the error is minimum, or
at your decision. Press the BACK button to exit
alignment procedure.
10. Adjust the Mount to Zero Position:
The Zero
Position is the position where the counterweight shaft
points to ground, telescope is at the highest position
with its axis parallel to the polar axis and the
telescope is pointing to the Celestial Pole. Loosen the
DEC and R.A. Clutches to adjust the mount to the
Zero Position. Tighten the screws after each
adjustment. Power the mount OFF/ON.
11. Manual Operation of the Mount
: Now you can
observe astronomical objects using the arrow keys of
the Go2Nova
®
hand controller. Flip the I/O switch on


Find Your Products By Category
Please Login
