
0
Owner's of the iOptron Telescope iOptron Telescope gave it a score of 0 out of 5. Here's how the scores stacked up:

6
iOptron Corp. | 6E Gill Street | Woburn, MA 01801 USA | (781) 935-2800 | Toll Free (866) 399-4587 | www.iOptron.com
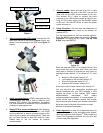
the telescope mount to turn on the mount. Use
►,◄,▼ or ▲ buttons to point the telescope to the
desired object. Use the number keys to change the
slewing speed. Then press STOP/0 button to start
tracking.
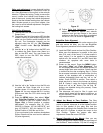
12. Star Alignment:
Star alignment will improve the
GOTO accuracy. From the main menu select “Align”.
Select “One Star Align” and press ENTER. The
screen will display “Adjust telescope to Zero
Position.” Press ENTER. A list of align stars that are
above the horizon is computed based on your local
time and location. Select a star and press ENTER.
Use arrow buttons to center the star in your eyepiece.
Use number keys to adjust the slew speed while
centering the object. (1 for slowest, 9 for maximum).
Press ENTER when finished. To increase the
accuracy you may choose to do multi-star alignment.
Note: two star alignment should be performed
after one star alignment.
13. Go to an Object:
The mount is now ready to GOTO
and track targets. Press MENU button, select “Select
and Slew” and press ENTER. Select a category (ex.
“planets, sun, moon”). Then select an object (ex.
“moon”). Then press ENTER. The telescope will
automatically slew to the object and lock on. It will
automatically begin to track once it locks on to the
object.
14. Sync to Target:
If the star is not in the center of the
eyepiece, one can use this function to center and
synchronize the object to improve the local GOTO
accuracy. Press MENU button and select “Sync. To
Target.” Press ENTER. Next use the arrow keys to
move object until it is centered in your eyepiece.
Then press ENTER again on the hand controller. A
Select and Slew has to be performed before “Sync
to Target” operation. This is most useful if you are
looking for some faint objects near a bright star.
“Sync to Target” is similar to “one star alignment”.
15. Identify Nearby Bright Objects:
After slewing to an
object using hand controller, a list of nearby bright
object(s) will be displayed by pressing the “?” button.
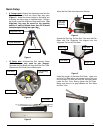
16. Remove the iEQ45 mount from a pier or tripod and
make sure it is positioned upright.
17. Remove Polar Scope Cover and unthreaded Polar
Scope from the mount.
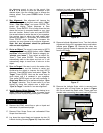
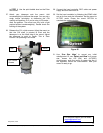
18. Lay down the mount head and unscrew top two (2)
Latitude Locking Screws (Figure 16). Keep two metal
washers in a safe place which will be needed when
converting the mount back to EQ mode.
Figure 16
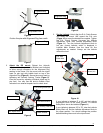
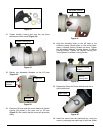
19. Remove Latitude Adjustment Lever. Turn the Latitude
Adjustment Knob until it separates the top and bottom
latitude posts (Figure 17). Remove the other two
Latitude Locking Screws to separate the mount head
from the EQ base.
Figure 17
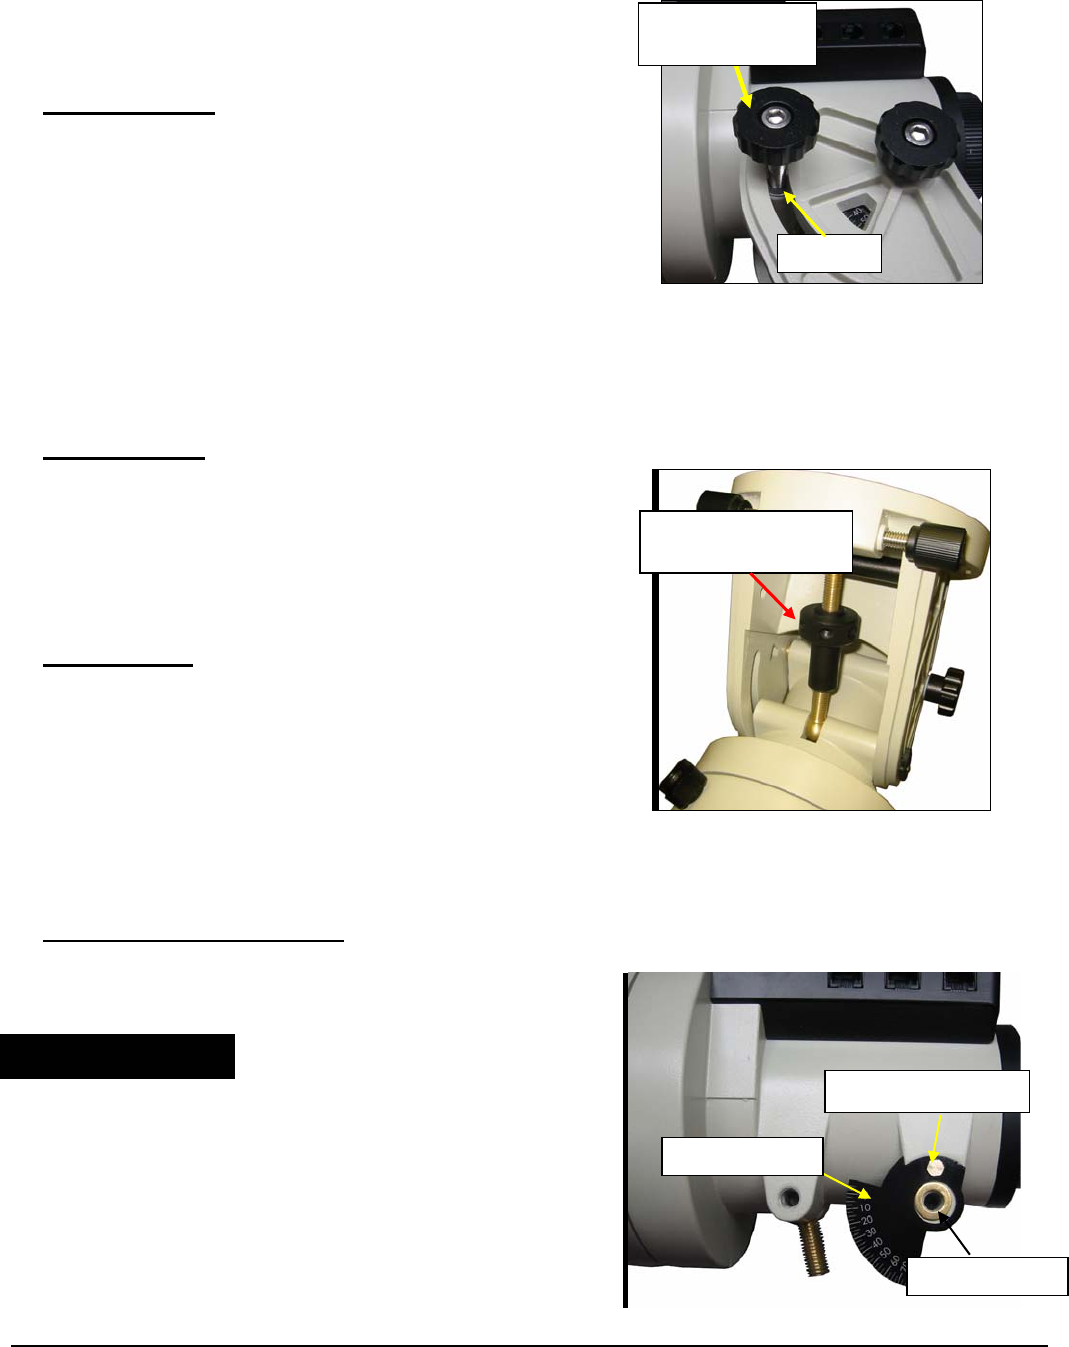
20. Remove the Latitude Scale, which is secured onto
the mount with a Fixing Screw, as shown in Figure
18. Do not break the plastic scale. These parts are
needed when converting the mount back to EQ mode.
Convert EQ to AA
Latitude Adjustment
Knob
Top Latitude
Locking Screws
Washer
Scale Fixing Screw
Latitude Scale
Brass Washer


Find Your Products By Category
Please Login
